Dynstat Bending Test and Impact Test DIN 53435
The Dynstat bending test, the Dynstat impact test, and the notched impact test to DIN 53435 are used in the characterization of material properties for components made of plastics.
Dynstat Bending Test and Impact Test to DIN 53435
If, for lack of space, only relatively small specimens can be taken from injection-molded parts, the two Dynstat test methods offer an interesting option for the comparative characterization of static and dynamic material properties in the areas of quality assurance and product development.
In 2017, the existing DIN 53435 standard was fully revised and updated. The contents of DIN 53435 and its associated instrument standard,DIN 51230 , were combined. By aligning this standard with other standards for impact testing, ISO 179-1 for Charpy impact tests, ISO 180 for Izod and ISO13802 regarding instrument characteristics and calibration, the body of standards are now harmonized and up to date with current technology. The use of notch type A for Dynstat impact bending tests is new to this standard. This notch type is also used in Charpy and Izod standards. A flexure tool with electronic torque measurement has been introduced for static flexure tests. Precision data collected from these test methods and the notch types now approved provide clues to possible areas of application.
The Dynstat bending test
- The Dynstat bending test is designed as a four-point bending test.
- With the new test fixture, the test can now also be performed on one testing machine. The support spans are 12 mm and 2 mm at the start of the test. This means a specimen as small as 15 mm in length can be tested with this method. Flexural deformation is produced by the test fixture's rotational movement. The test result is the maximum flexural stress measured during the test. It is calculated using the bending moment and the resisting moment of the specimen. If the specimen does not break by the time it reaches the Dynstat bending angle defined by the standard, the flexural stress is measured at this point.
- Large discrepancies in material characteristics of the finished part, due to morphology effects, occur in molded parts. These can be measured and compared with this test method.
- In round robin tests, very good conformity could be verified between the measured values according to the previous measurement method (torque application via pendulum arm) and the electronic measurement of the torque. The repeatability of the measured values is significantly improved by the uniform application of the bending angle and by the electronic torque measurement.

Take advantage of the leading testing software in materials testing
ZwickRoell’s testXpert testing software offers:
- Simple operation: start testing right away and be a testXpert while maintaining maximum safety.
- Reliable and efficient testing: benefit from reliable test results and maximum testing efficiency.
- Flexible integration: testXpert is the optimal solution for all of your applications and processes—simply put, a more effective workflow.
- Future-proof design: testing software for the entire life cycle, ready for your future test tasks!


Dynstat impact test and notched impact test
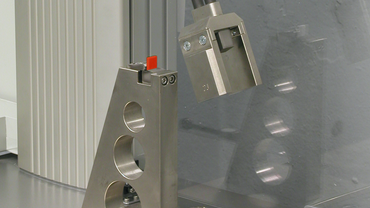
- The Dynstat impact test is performed with upright specimens, similar to the IZOD method.
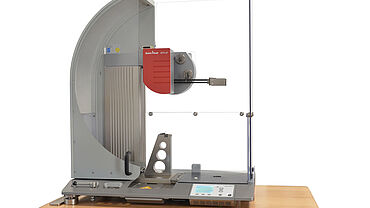
- The testing instrument is a pendulum impact tester to ISO 13802 which is equipped with a special specimen holder and a Dynstat pendulum hammer.
- The test is also performed here with a small specimen, only 15 mm long and whose overall dimensions are identical to those in the Dynstat bending test.
- Since a specimen break is required for determining impact strength, the test can be performed on brittle materials with unnotched specimens, while more ductile materials can be tested with notching.
- The standard provides the U-shaped Dynstat notch (notch shape D), which enables the comparison of values with previous results. Since notch shape A is common in Charpy or Izod impact strength measurement and many laboratories have the appropriate notching equipment, this notch shape has been included in the standard. Between the results of notch shapes D and A, there was broad conformity for PP and ABS.
Video: Pendulum Impact Testers for Plastics Testing
ZwickRoell’s HIT series pendulum impact testers for the plastics industry offer a high-precision, cost effective solution. The pendulum impact testers are available from 5 to 50 joules and enable not only the standard-compliant performance of Dynstat impact and notched impact tests to DIN 53435, but also Izod, Charpy and tensile impact tests to ASTM, ISO.
