ASTM D256: Notched Izod Impact Strength of Plastics
The notched Izod impact test according to ASTM D256 is one of the most important test methods for determining the impact strength of plastics. In practice, many tests fail due to inadequate specimen preparation, incorrect alignment, or unsuitable testing systems.
With standard-compliant pendulum impact testers, the requirements of the ASTM standard can be reliably met, and reproducible test results can be obtained for material comparison, quality assurance, and material development.
Common sources of error Test procedure Applications FAQs on ASTM D256 Downloads Free consultation
ASTM D256 Notched Izod impact strength: Key points
- In practice, many tests fail due to inaccurate specimen preparation, incorrect alignment, or unsuitable testing systems.
- Testing methods that comply with standards and controlled testing conditions are essential for reproducible test results.
- When test volumes are high, operator-related factors resulting from manual handling lead to additional variability, longer test times, and increased labor costs.
- Using appropriate pendulum impact testers for plastics can help avoid typical sources of error and achieve consistent results.
- This test is used in areas such as material development, quality assurance, and incoming goods inspection.
- The testXpert testing software enables centralized evaluation, integration into existing systems (ERP/LIMS) and early detection of deviations.
ASTM D256 in practice: Common sources of error and their effect on test results
In practice, unreliable or incomparable results in notched Izod impact tests conducted in accordance with ASTM D256 are often caused by deviations in the test procedure or from the standard requirements. Even minor errors in specimen preparation, test setup, or test conditions can significantly affect the measured impact strength.
Typical causes and their effects are:
- Inadequate or improper specimen preparation: Even minor inaccuracies in the notch cutting process (geometry, depth, position) caused by different cutting tools or methods, as well as poor notch quality (e.g., burrs, cracks), alter the stress concentration at the notch. As a result, the notched impact strength measured may deviate significantly from the actual material behavior.
- Deviations in specimen dimensions and notch geometry: Dimensions or geometries that do not comply with standards result in results that are no longer comparable to specified values or other tests.
- Errors in specimen handling: Delays between removing the Izod specimen from the temperature chamber and testing (ASTM D256 requires a maximum of 5 seconds) can lead to temperature loss and inaccuracy in test results.
- Inaccurate alignment and clamping of the specimens: If the specimen is not precisely positioned or if different clamping forces are applied, the fracture behavior changes. This results in increased variation in the test results.
- Unsuitable selection of the pendulum hammer: A pendulum hammer with an unsuitable energy capacity (impact energy must not exceed 85% of the energy capacity) or one operating outside the optimal measurement range can impair the accuracy of the results.
- Failure to account for energy losses outside the test specimen: The measurement method assumes that all energy losses are attributed to the specimen. External energy losses (e.g., due to friction or vibrations) distort the results if they are not minimized or corrected.
- Inadequate correction of friction losses: Air friction and friction at the pendulum hammer’s bearing points cause unavoidable energy losses. If these are not regularly calibrated, checked, and correctly attributed to the respective pendulum hammer, systematic errors will occur.
- Insufficient mass or unstable positioning of the testing instrument: If the pendulum impact tester is not heavy enough or is not vibration-free (e.g., on an unstable laboratory table), vibrations and movements during the test can lead to additional energy losses and thus to erroneous results.
For reproducible and comparable results, it is therefore crucial to perform the test strictly in accordance with standards, but also to minimize operator influence—from specimen preparation and selection of the testing system to stable testing conditions.
Here’s how the test works:
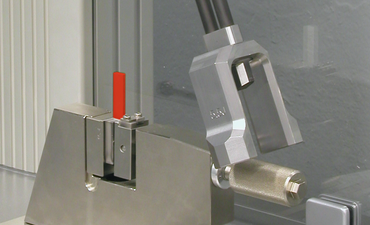
The pendulum hammer consists of a pendulum rod with an impact body and is mounted on a low-friction bearing. During the test, the pendulum hammer strikes a notched specimen, which is clamped at one end, with a defined amount of energy. Part of the kinetic energy is absorbed by the material, so that the pendulum hammer no longer reaches its original drop height after striking through the specimen. The absorbed impact energy is determined from the difference between the height of fall and the height of rise.
The specimen is clamped vertically so that the notch is located exactly in the area of the greatest bending moment. A controlled clamping force—for example, using pneumatic clamping systems—contributes significantly to reproducible test results.
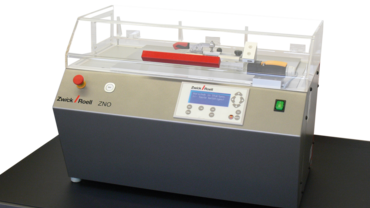
ZwickRoell’s pendulum impact testers for plastics can be used for the Izod impact test in accordance with ASTM D256.
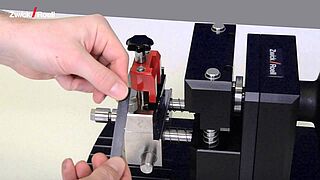
The Izod pendulum impact testers feature two types of impact blocks that allow for either manual, precise clamping or pneumatic, rapid clamping, ensuring the safe and reproducible securing of a wide variety of specimens—even those made of materials sensitive to clamping forces. Centering devices and quick-change inserts ensure that every specimen is precisely aligned and that even temperature-controlled and clamp-sensitive materials are tested reliably and in accordance with standards.
The standard pendulum hammer to ASTM D256 has a potential energy of 2.75 J at a drop height of 610 ±2 mm. Additional hammer sizes are obtained by doubling the initial potential energy at the same drop height. This results in an impact velocity of approx. 3.46 m/s. For standard-compliant tests, the lightest pendulum hammer whose energy capacity is sufficient for the measurement is selected.
To ensure reliable test results, external influences such as friction or vibration losses must be minimized. High-quality pendulum impact testers are therefore calibrated accordingly and designed to minimize energy losses. Modern systems, such as ZwickRoell’s pendulum impact testers, use, for example, particularly stiff and lightweight double-rod pendulums made of unidirectional carbon materials which are very low in mass and at the same time offer optimal stiffness, to reduce vibrations and increase measurement accuracy.
In addition to these equipment-related factors, operator influence has a significant impact on the reproducibility and efficiency of test processes in practice. Especially when dealing with large quantities or repetitive test tasks, manual handling leads to additional variations, longer test times, and increased labor costs. ZwickRoell’s robotic testing system roboTest H handles the automatic feeding, temperature control, and positioning of specimens, thereby ensuring consistent testing conditions and significantly reducing operator influence.
Are you looking to automate ASTM D256 tests and optimize your processes?
Our robotic testing systems enable fully automated Izod impact testing—ensuring consistent test conditions, reduced variation, and efficient batch testing without manual intervention.
Our automation experts are here to advise you!
Video: Pendulum Impact Testers for Plastics Testing
ZwickRoell’s HIT series pendulum impact testers for the plastics industry offer a high-precision, cost effective solution. The pendulum impact testers are available from 5 to 50 joules and enable not only the standard-compliant performance of ASTM D256 Izod pendulum impact resistance, but also Charpy, Dynstat and tensile impact tests according to ASTM, ISO and DIN.
Use Cases: Applications of the test method to ASTM D256
Typical applications of the notched Izod impact test according to ASTM D256 include situations where rigid plastics are subjected to impact loads or where their mechanical robustness must be reliably assessed. The test provides comparable performance metrics that are used in development, quality assurance, and material approval.
Typical applications of the test method include:
- Material comparison in material development: Different polymer materials, compounds, or formulations can be compared in terms of their Izod impact strength This allows materials to be specifically selected or optimized for applications involving increased mechanical stresses.
- Quality assurance in production: In series production, the ASTM D256 test is used to monitor consistent material properties. Deviations in raw materials, processing, or batches can be detected early on.
- Incoming goods inspection of plastics: When testing granules or semi-finished products, this ensures that delivered materials meet the required mechanical properties.
- Testing of components and extracted specimens: Specimens can be extracted directly from finished parts or injection-molded parts to verify the actual material properties within the component.
- Evaluation of aging and environmental influences: Comparative tests allow for the analysis of changes in Izod impact strength, for example, following temperature stress, contact with media, or UV exposure.

Optimal integration of the test to ASTM D256 through our testXpert testing software
One testing software solution for everything: impact strength testing to ASTM D256, tensile testing, flexure testing, melt flow testing. And all the data can be evaluated together.
- Numerous import and export possibilities ensure ideal integration of testXpert and ASTM D256 impact testing into your processes. The testing software automatically reads data in and out of other systems, for example, your company’s own ERP or LIMS.
- The measurement of specimen dimensions to ASTM D256 is integrated: During the measurement, the remaining width, height and width of the specimen are transmitted from the measuring device to testXpert at the touch of a button.
- All characteristic values obtained from the impact strength test to ASTM D256, the tensile test, the flexure test and the melt flow test are stored together in one database. The test data is easy to find, evaluate and reproduce—across all applications. Access is easy via web browser from any location that's convenient for you.
- Our Trend Analysis feature provides a statistical process control (SPC) chart that allows you to detect possible deviations from quality specifications in a timely manner.
Frequently asked questions about Izod impact strength to ASTM D256
A conventional Charpy or Izod impact test, measures the impact energy emitted by a pendulum hammer when striking through the specimen. This energy can easily be determined from the difference between the release height of the pendulum hammer and its height of rise after the impact. In the ISO standards, the impact energy is related to the cross-sectional area of the specimen and given in [kJ/m²], while in ASTM standards it is common to relate this energy to the thickness of the specimen to indicate an impact strength value, for example, in [ft lbf/in].
The notched Izod impact test to ASTM D256 generates characteristic values for the impact resistance and notch sensitivity at high strain rates in the form of a thickness-related energy value. In addition, the following are used:
- ASTM D4812: An Izod test method for the measurement of the impact strength of unnotched specimens
- ASTM D4508: An Izod test method for measurement of small specimens (Chip impact), which is a counterpart to the Dynstat impact test to DIN 53435.
- ISO 180: Describes the Izod impact test for determination of the impact and notched impact strength of plastics. It provides characteristic values for the impact strength at high strain rates in the form of a cross-section related value.
Both test methods characterize the impact strength of a plastic material. The Izod test method, in which the specimen is positioned vertically, is normally used inASTM standards. The Charpy method, which uses a three-point bending arrangement, is the preferred method in ISO standards.
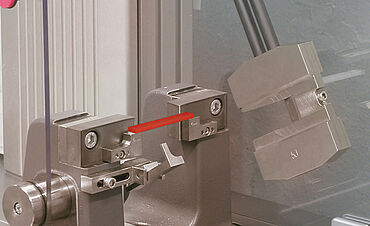
Both methods are used to measure notched impact strength, for which the notched specimen is struck so that the notch is in the tensile zone of the bending caused by the impact. For the Izod test, this tensile zone is on the impact side of the pendulum hammer and for the Charpy test it is on the opposite side.
The Charpy method provides various benefits when testing at low temperatures, since the points of contact of the specimen in the pendulum impact tester are relatively far from the point struck by the pendulum hammer. In this way, the temperature is not affected or withdrawn by the supports in the relevant area and the specimens can simply be fed from a temperature controlled box.


The notched Izod impact test to ASTM D256 is used on all plastics to characterize the behavior resulting from impact stresses. The flexural impact stress is applied with edgewise impact to a notched specimen that is gripped on one end. The result is presented as the thickness-related energy absorption of the specimen.
This standard supports various procedures, notch sizes and notch arrangements to test the notch sensitivity of a polymer material.
- Method A is used for plastics with a notched Izod impact strength greater than or equal to 27 J/m. In this case, a notch radius of 0.25 mm is used. The result is calculated directly from the height of rise of the pendulum hammer after the impact.
- Method C is used for very brittle plastic materials with a notched Izod impact strength of less than 27 J/m. It corresponds to Method A, however the measured impact energy is corrected by the amount of the calculated centrifugal work of the specimen.
- Method D is used to characterize the notch sensitivity of a polymer material. Here, the notched impact strength is measured on specimens with different notch radii, and the notch sensitivity is calculated as a linear gradient over the notch radius.
- Method E is used to estimate the impact strength on unnotched specimens. For this method, the specimen is gripped rotated by 180° so that the notch is positioned opposite the direction of impact. The result is only conditionally comparable with the test of an unnotched specimen.
The outer dimensions of specimens to ASTM D256 are specified to a length of 2.5 in (63.5 mm) and a height of 0.5 in (12.5 mm). The width of injection molded specimens may be between 0.118 in (3.0 mm) and 0.5 in (12.5 mm), whereby the use of specimens with a width of 1/8 in (3.2 mm) or 1/4 in (6.35 mm) is common.
Exact details can be found in the specifications of the material to be tested, or must be coordinated between the parties involved. For specimens that are machined from components, the wall thickness of the component normally determines the width. Specimens taken from thinner wall thicknesses are tested using the impact test to ASTM D1822.
Since the method describes a notched impact strength measurement, the specimen must be notched.
- For the commonly used Method A, a notch with a radius of 0.25 mm and an angle of 45° is milled into the specimen so that a height of 0.40 in (10.16 mm) remains at the base of the notch.
- If the notch sensitivity is to be measured according to Method D, the specimens must be prepared with different notch radii. In addition to the standard notch according to Method A, specimens are machined with a notch radius of 0.04 in (1.0 mm).


